Friday, November 30, 2012

November Coloring Contest Winner!

We had some really great submits for our November coloring contest! Here is a look at the wonderful creations from Nali (Pajamas) and Bina (Mittens).


Don't you love how colorful they are? Only thing lacking were some "Likes".

Now a look at our winning page from 2 year old J (with a little help from mommy Lisa)!

CONGRATS TO J!!!
We hope to see all our contestants this time and more next month!!

Eva and Zi

Monday, November 26, 2012

CYBER MONDAY at the HONEYCOMB

TODAY ONLY--15% OFF EVERYTHING in the HONEYCOMB STORE!

Use code MONDAY in promotion box. 
HAPPY SHOPPING!!

Thursday, November 22, 2012

Happy Thanksgiving

Happy Thanksgiving! 
We are thankful for all our faithful readers.
May you have a wonderful time with your family and friends!

Eva and Zi

Wednesday, November 21, 2012

Favorite Thanksgiving Sides

I like to make a traditional American Thanksgiving dinner. There won't be a dish of sticky rice in our spread, like some of our Asian friends like to do. Our feast will have turkey, a soup or salad, bread, corn, mashed potatoes, candied yams, stuffing, cranberry sauce, shrimp, a fruit salad and pumpkin swirl cheesecake! Are you hungry yet?
My mom's candied yams and the pumpkin swirl cheesecake are always a crowd pleaser.
So I thought I'd share them with you.

Mom's Candied Yams
I'm sorry there are no exact measurements since it's a family recipe
(This can be made to any size portion)
Yams
Light brown sugar
Butter

Peel and cut yams. Boil yams til it's half cooked, drain and place yams in a bake dish. Lay each piece side by side. Do not overlap.
Sprinkle brown sugar and slices of butter generously on top of yams. Cover with foil.
Bake at 325 degrees F for 20 minutes covered.
Flip each piece and sprinkle more brown sugar and slices of butter and cook for another 20 minutes.
Remove cover and cook for another 15 minutes.
* For best results cook the night before and reheat in oven when ready to serve. The yams get more caramelized and the flavor sets in. Mmmm!

Pumpkin Swirl Cheesecake
PREP: 25 minutes plus refrigerating
BAKE: 55 minutes

2 cups finely crushed ginger snaps
1/2 cup finely chopped pecans
6 Tbsp. butter, melted
3 pkg. (8oz.each) of 1/3 fat cream cheese
1 cup sugar divided
1 tsp. vanilla
3 eggs
1 cup canned pumpkin
1 tsp. ground cinnamon
1/4 tsp. ground nutmeg

Mix ginger snap crumbs, pecans and butter. Press onto bottom of 9 inch- springform pan.
Beat cream cheese, 3/4 cup of the sugar and vanilla with the electric mixer on medium speed until well blended. Add eggs, 1 at a time mixing on low speed after each addition just until blended.
Reserve 1-1/2 cups of plain batter. Stir remaining 1/4 cup of sugar, pumpkin and spices onto remaining batter. Spoon 1/2 of the pumpkin batter over crust; top with spoonfuls of 1/2 of the reserved plain batter. Repeat layers. Cut through batter with knife several times for marble effect.

Bake at 325 degrees F for 55 minutes or until center is almost set if using a silver springform pan.
(Or bake at 300 degrees F for 55 minutes or until center is almost set if using a dark nonstick springform pan.) Loosen cake from side of pan; cool before removing rim of pan.
Refrigerate 4 hours or overnight. Store leftover cheesecake in refrigerator. Makes 12 servings.

ENJOY!
What is your favorite dish that you make during the holidays? 
Please share a good recipe if you have one. I'd love to try it!

Eva

Monday, November 19, 2012

Gobble, gobble, gobble

Ready for turkey day? Are those elastic pants cleaned & ironed? (Like the ones Joey wore on the Friends Thanksgiving episode) Ever since I got married we started a tradition of having Thanksgiving every year at our place. This gives my Dad and Mom a well deserve break from the many years of cooking us Thanksgiving dinner.

I really love this holiday since it's a day with my family and close friends, enjoying a good meal and reflecting on God's blessings in my life. There's less of a rush compared to Christmas, with the exception of Black Friday (but that's another post). It marks the beginning of the holiday season!

Here's a little turkey craft I did with H for Thanksgiving. We made turkey beaks and Thanksgiving cards.
WHAT YOU WILL NEED

  • Markers, paint or crayons
  • Scissors
  • Long wooden stick and/or straw
  • Card stock paper
  • Glitter (optional)

  • Click HERE for free turkey art.

    Will you be cooking the turkey Thursday? 
    Hope your kids have fun making theirs! 
    Wishing you and your family a very Happy Thanksgiving!

    Eva

    Friday, November 16, 2012

    New Sets!

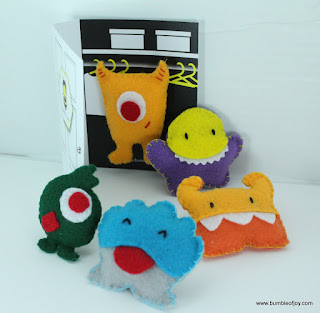
    Introducing a couple more Holiday Specials today--Monster and Transportation Magnet Sets!

    Now in our "honeycomb store"  you can get all our monster magnets for $20 and all our transportation magnets for $25!

    So what are you waiting for, go check them out now!


    Eva and Zi

    Thursday, November 15, 2012

    Throwback Thursday: Finding THE Dress

    When I read about the idea of "Throwback Thursday" on Sweet Tiny Blessings I thought it was a such a fun idea and decided to come up with something to post.

    Let just say it was a lot of fun looking through old photos and trying to decide which one I should write about was not easy. My husband suggested that I write about our wedding but there is so much I could write for that post it would be SUPER long. But I did stumble upon some pictures that were taken when I was looking for my wedding dress and thought, there may be something there to write about.

    So today I want to do a little looking back at finding THE dress! I'm sure every married woman out there knows how it feels like when you are looking for your wedding gown. You look online and through tons of wedding magazines to find the type of styles that you like and the look you want for your big day. Then you make appointments to go to shops and boutiques to try dress on and hope to find THE perfect dress!

    I knew early on that I didn't want a "princess" type dress, not that there is anything wrong with that. If you want to look like a princess on your wedding day, go ahead, because you sure do feel that way. But it wasn't the look I wanted. I wanted something that would make me feel like a celebrity on the red carpet of the Academy Awards!

    The first store that I went on to try on dresses, had more princess like dresses. They were absolutely beautiful but just didn't feel right for me.

    Then at the second store that I went to with all my bridesmaids and my mom who happened to be visiting then, I saw a dress on display that I knew was what I was looking for.  I tried it on and immediately fell in love with it!
    *Color wasn't right but was a unique dress that I immediately fell in love! Absolutely love the asymmetrical look!

    Since this was one of the early dresses I tried on, I didn't want to commit right away, though in my heart I knew I had found THE dress. So I tried on a few more dresses and even went to another store to try on some more dresses that were all beautiful but just not quite right. Later on that day I went back to the store to buy this dress.
    *On the day of my wedding!

    Till this day I still absolutely love this dress! I have it cleaned and preserved in hopes that one of my daughters will want to wear it when they get married. We'll see how that goes.
    So this is my little walk down memory lane for #Throwback Thursday, hope you enjoyed reading it as much as I liked writing it!

    Click here to see the other entries: Sweet Tiny Blessings Throwback Thursday

    What was your wedding gown buying experience like? Did you try on many till you found THE one or did you find it pretty quickly like I did?
    Zi

    Wednesday, November 14, 2012

    Quad E's First Real Train Ride

    This past weekend the Quad E's went on their first real train ride. Here is the thing about living in the suburbs, at least where we live, you pretty much have to drive to get places. And even though Quad E's paternal grandparents live in New York City, we usually drive there too and don't take the subways when we are there. So the Quad E's have never been on a real train before. Sure, they have been on those small train rides at amusement parks but not the real thing.

    My husband and I had talked about this during the summer and decided we wanted them to have the experience of sitting on a real train. New York City was just a little too far and expensive, so we decided that we would take the train to center city Philadelphia and go to Reading Terminal Market and Chinatown.

    Of course life is always busy and we didn't get to execute our plan till this past Saturday. Luckily the weather was a wonderful 65 degrees and was a great day for the train and to walk around the city a bit.

    Another good thing was children 4 and under ride free, so our kids just made the cut off, woohoo! So after arriving at the train station 15 minutes before our train we wanted to catch, we bought our tickets and stood on the platform waiting for the train to arrive.

    During the time we were waiting, my husband ran through some basic train riding safety guidelines with the triple E's.
    "See this yellow area? Don't cross it till the train comes to a full stop."

    Of course during the trip there, since everything was new and the triple E's had no idea what to expect, they quietly sat on the bench and waited for the train to come. Waiting for the train back was a slightly different story, I'll get to that later.

    "Here comes the train!"

    The kids had a great time looking out the window and watching the scenery change while we headed towards center city. Even E4 enjoyed the scenery for a while before dozing off in his stroller.
    When we arrived at Market East Station, we just walked down the street and arrived at Reading Terminal Market. Since it was a Saturday the market was pretty crowded so it was a bit crazy trying to get lunch and finding a place to seat. But once we did find a few tables that would fit our big family, we had a great lunch while enjoying some free live music! After lunch we got the chance to pick up some Christmas gifts and fresh produce as well.

    We also took a short walk around Chinatown and picked up some Chinese pastries which was a nice treat since we don't usually get those too often.

    Then we headed back to the train station and got ready to wait for our train to arrive. Now that the kids were a bit more familiar with their surroundings and what to expect, they were bolder and felt that they could walk a bit closer to the edge of the platform. Granted, they weren't really that close, maybe a good three or four feet away but as a mother I was really nervous, that they would trip and fall in or that the kids would start messing around and bump into each other causing one of them to fall in. I guess that's what happens when your a mom. So I quickly asked them to walk a bit further away from the edge of the platform. 

    During the few minutes while we were waiting for the train, I seriously was going through scenarios and what our plan of action would be if one of the kids were to fall on the tracks. My initial plan was that I would jump in the get them and then pass the child to my husband and then he could pull me up. I had decided that it was a better idea for me to jump in because my husband would have the strength to pull me up and I wouldn't if the roles were reversed. Geez, am I paranoid or is this just part of being a mom?

    The ride back was fun as well, since the kids were more relaxed and had a fun time looking out the window and pretending they were the animals in Dumbo since Dumbo rides on the circus train and the kids LOVE that movie! Overall, a great first experience!

    *After I typed up this post, I read on Design Mom that she was doing a "Love the Place You Live" link up and thought this would be really appropriate for that theme! So if you stumbled upon our page from there, welcome! Leave a comment and don't forget to also check out our "honeycomb store"!

    Do your kids like trains? Have they had a real train ride experience? If so how was it like?
    Also, do you go through some crazy scenarios in your head sometimes like I did?

    Zi

    Monday, November 12, 2012

    Hurricane Sandy

    We count our blessings that we are safe and didn't lose our home. It saddens me when I read or hear how others lost so much. The worst for us was not having power for 6 days. You realize how much our lives rely on electricity, like lights, heat & keeping the fridge cool. But it also meant no TV, phones, computer and... GASP, the internet! Oh wait, no cup of coffee in the morning too!?!

    The kids would ask me, "Mommy I want to watch something." After a day or so they understood that no power meant no TV or  DVDs. Fortunately they kept themselves entertained and life was possible without any TV or computer time.

    Can you find N?


    BOO!
    At first it was "fun" starting up the fireplace and camping out in front of it to keep warm. I threw a bunch of pillows and blankets on the floor and that's where we had our slumber party every night. Since there wouldn't be any trick or treating in the pitch black neighborhood I broke out the glow sticks one night and the kids had fun running and playing in the dark. Once it got dark the kids just assumed it was bedtime even tho it was only 7 o'clock. Funny how they were ready for bed while in normal circumstances come 9 o'clock they can be still running full speed.
    Do you think if I just didn't turn on any lights one night they will go to bed early and I can have an early night?

    Fortunately we had good friends who lived 5 minutes away and had power. They gave us some warmth and a hot shower. They even loaned us their generator. Another lesson learned, must buy a generator.

    The day Sandy finally left my husband called us to look in our backyard. We saw over a dozen wild turkeys roaming around and eventually they headed back to the woods. Pretty amazing sight!
    Through this storm God gave me a few good reminders. Time with my husband, kids, family and friends hold greater value. Even the mundane things I take for granted, like a hot shower or cup of coffee. I truly feel blessed and have so many things to be thankful for in my life. It was nice to have a break from "modern life".

    What would you do to keep entertained if you had no power? 
    Would you break out a book you've been meaning to read or play a board game?

    Eva

    Friday, November 9, 2012

    November Coloring Page Contest

    We are going to continue to have our once a month coloring page contest till the end of this year and then we will re-evaluate to see if we might change up the frequency of these contests. But if you really enjoy our free coloring pages and contests, please let us know in the comments or if you have any other suggestions, we would love to hear from you!

    For this month, since we haven't gotten too many votes in our Mittens and Pajama elections, we thought we would continue that and have your kids pick their favorite monster, color the page, and then you can submit to our FB page for your friends to "Like".

    Minor change to our coloring contest this month, the time to submit your pages will now be extended, so if you have any printer problems, hopefully this will give you enough time to resolve those problems and still participate!


    Pajama

    Mittens

    Contest Rules:

    Contest Start Date:   11/09/2012
    Contest End Date:    11/29/2012

    1) Only 1 entry per child. "Like" our FB page and post your child's colored masterpiece on our page with first name/initials (whatever you are comfortable with) and their age. You can either scan or take a picture of the colored paged to post on our page.
    2) Entries posted by someone who has not liked our page will be disqualified.
    3) Get your friends to "Like" our page and vote by liking your child's masterpiece. The page with the most "Like"s wins. If there is a tie the winner will be chosen based on our discretion.
    4) Only residents of 48 states in the continental US are eligible.
    5) Prize depending on gender: Girls will get a hair clip from BOJ and boys will get a pin from BOJ.
    6) Winner will be announced 1 day after the contest end date on our FB page and on the blog.
    7) The winning coloring sheet will also be posted on our blog when the winner to announced.
    8) For privacy reasons, we ask that the winner send BOJ a private message on our FB page so that we can connect with you and get the prize mailed out in a timely manner.
    9) We want as many children to have a chance to win our coloring page contests; so we reserve the right to limit the amount of times a child can win consecutively.

    Here is the link for the coloring pages for Pajama and Mittens.

    Please comment and let us know you like our free coloring pages, so we will be encouraged to keep them coming. Also don't forget to pin them to your Pinterest boards to share with others.

    Eva and Zi

    Thursday, November 8, 2012

    Holiday Craft With Acorns

    I wanted to share a fun little craft I did with the kids last year around the holidays. It makes for a great decoration and is simple for small kids.


    You will need:
    1) Small wooden people (usually come in 3-4 per pack at Michaels)
    2) Red felt
    3) Acorn caps
    4) Sharpie

    First off collect some acorn caps whenever you are out for a walk. It is best if you can find ones that still have the stem. Mine originally all had stems but after the kids played with them, they fell off, oh well! Then get some small wooden people from your local craft store. I got mine from Michaels and they came in either 3 or 4 per pack. Cut red felt into small strips and taper the ends so they make a pleasing looking scarf.

    Once you have all the materials in order, you are ready for your little one to start assembling. Using Aleene's tacky glue or any type of strong adhesive you may have, attach the acorn caps to the top of the wooden people. Then tie the felt scarves around their necks. You can attach them as shown in my picture or get a little more creative and try tying them another way. And last but not least, draw some fun faces on them.

    Originally if the stems had been kept on by the kids, I was going to try and use a needle to attach a thread loop on top of them so they could be hung on our tree. So that is definitely an option if you are trying this craft with your children.

    What are some holiday crafts you like to make with your kids? Would love to hear from you!

    Zi

    Tuesday, November 6, 2012

    GO VOTE!

    Did you go vote today?

    Our monsters have their own election going on too.
    Who will you vote for?


    Pajama
    OR
    Mittens

    (Click on links for free color page)

    Have your kids vote on our Facebook page!
    Eva & Zi

    Monday, November 5, 2012

    HOLIDAY SPECIALS!!

    It is still a little early for holiday shopping but we didn't want to wait till the last minute to share these wonderful HOLIDAY SPECIALS with you!

    From now till Christmas Eve, if you buy $20* or more worth of merchandise from our honeycomb store you will get a FREE fabric envelope that you can use to hold goodies in your purse or even slip one of our hair clips, pins or magnets for a special child this holiday season!


    If you buy $50* or more worth of merchandise, you will get a FREE set of 4 beautifully crafted heart felt heart ornaments for your tree!


    These are all items that were made specially for the holidays and cannot be bought in our store. So don't wait and start shopping for those special children on your list.

    We will have a few more special promotions coming this holiday season, so don't forget to check back here often!

    *Note: Dollar amount of total honeycomb store purchases does not including shipping cost.

    HAPPY SHOPPING!

    Eva and Zi

    Friday, November 2, 2012

    Fall decor

    Before kids I would change the décor around the house each season now I only decorate for the holidays. I know stores have their Christmas decorations already but really let's enjoy fall first. Don't you agree?  Is it me or do they have it out earlier each year?

    I found these cool gel stick-ons for the kids to decorate our storm door and windows. 

    H&N had so much peeling them off and sticking them on our storm door and windows. The downside is that it can tear apart. I think the kids thought it was like one of those stretchy toys. They were only a dollar so I can’t complain. They also can stick onto your clothing if you happen to lean against it. One morning my husband was getting into work and noticed a sticky leaf on his shoe. He had no idea it was from our front door. He thought it was something gross and sticky so he quickly threw it away. I asked him, “Didn’t you notice the decorations on the door?” I had to laugh, my husband is not one to notice details like that.
    End result a cheap and fun decoration the kids can help with. Best place for it is probably a window where it’s less likely to fall off and attach itself onto you. Unless you want to start a fashion trend.
    Check out our Decor Ideas and Inspiration board on Pinterest.

    Do you like to decorate your house when the holidays arrive? 
    Do you have any festive fall decorations ideas to share? I'd love to hear your inspirations.
    Eva

    Thursday, November 1, 2012

    Quad E's Playroom

    So I mentioned in my toadstool post that my husband and I had worked on finishing our basement a few years ago. When we first bought our house, the basement was partially finished, the area right at the landing of the stairs was finished but then there was a huge part that was mostly unfinished. There was basic framing already up but nothing else.

    See this panoramic picture of the basement area before we started work.

    So after much dreaming and pouring through images of many basements and playrooms online, we decided on what we wanted for our basement and started the work. I'm blessed with a very handy husband, so he was able to spend his free time on weekends, finishing a little part of the basement. It took us a full year to get everything done but it was well worth it because we saved a lot of money! Spending around $4000 at the end of the day to get this project done.

    Here is a panoramic view of the finished basement.
    A picture of the much talked about playhouse.
     *Inside the playhouse.
    The door and light switches are all child sized or level but the ceiling level is the same as it is outside so adults can go into the playhouse as well, just need to bend over quite a bit to get through the door.
    My husband also built that corner bench with storage underneath, which is a super comfy space. We spend time reading there all the time and when I was pregnant with E4, I spent a lot of time laying down on that bench while the older kids played in the later months of my pregnancy.
    And can you guess what those colored paint cans that line the top of the shelf on the right is made of? Used formula cans! I had the idea when we had E2 and E3 since we were going through so many of those formula cans, I vowed to find another use for some of them and voila, they turned into paint can decorations for our basement!

    The round table that we use for crafts and the round side table that holds extra books were both found at various yard sales and refinished for our basement. There is so much I could share about this project but I'll just end it here. If you have anything you are curious about, feel free to ask in the comments.

    So far it has standed up to the test of time and the kids. There were a few things we needed to update though after the kids actually spent time in it. We have rain gutter bookshelves attached to a sliding door and we had to reinforce those to stand the abuse from the kids. And the toadstool pots that originally decorated the "lower level" windows had to be moved to the "second level" windows because they were getting pulled at too much from the kids.

    Hope you enjoyed this little tour, please leave some comments and show some love!

    Zi